Texas Potatoes: A Growing Guide for Bumper Crops!
Growing your own texas potatoes in the Lone Star State can be a rewarding experience. Proper soil preparation is key, and understanding the specific climate challenges of Texas, such as the intense summer heat, will greatly improve your chances of success. The Texas A&M AgriLife Extension provides excellent resources and guidelines, and their publications offer insights into optimal planting times and pest control strategies. With a little planning and the right techniques, you can harvest a bumper crop of texas potatoes from your own backyard, making homegrown dishes a delicious reality.

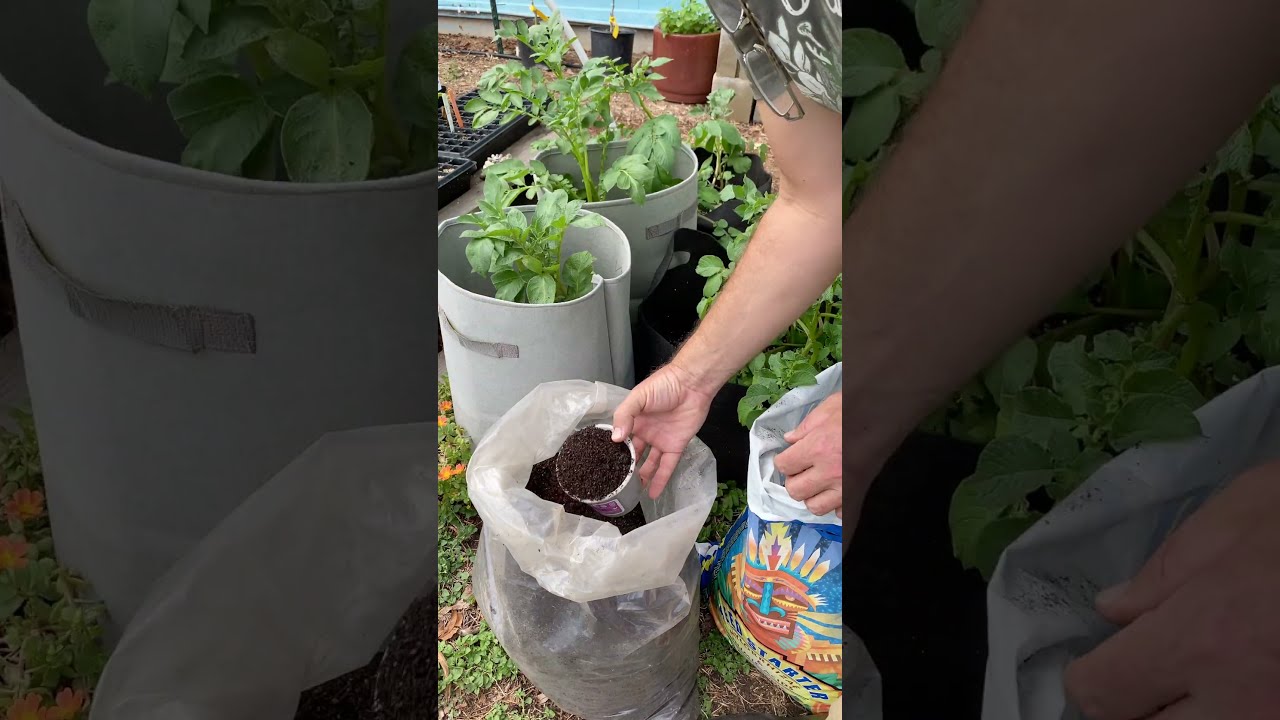
Image taken from the YouTube channel Faiths Oven , from the video titled Texas Potatoes .
Digging into Texas Potato Growing: A Gardener's Delight
Welcome, fellow Texans, to the rewarding world of cultivating your own potatoes! In a state known for its vast landscapes and diverse climates, growing potatoes might seem like a challenge. However, with the right knowledge and techniques, even the most novice gardener can enjoy a bountiful harvest of this versatile vegetable.
The Joys of Homegrown Potatoes
There's a unique satisfaction that comes from nurturing a plant from seed (or, in this case, seed potato) to table. Imagine the pride of serving a meal featuring potatoes you grew yourself, knowing exactly where they came from and what went into their cultivation. This connection to your food is one of the greatest rewards of gardening.
Texas: A Surprisingly Suitable Climate
While Texas summers can be scorching, our cooler seasons and strategic planting windows offer ample opportunity for successful potato crops. Different regions of Texas present varying challenges and advantages, but the adaptability of certain potato varieties makes homegrown spuds a viable option across the state.
The Advantages of Growing Your Own
Freshness and Flavor
Homegrown potatoes offer a level of freshness and flavor that you simply can't find in the grocery store. Dug fresh from your garden, they haven't endured weeks of storage and transportation, resulting in a superior taste and texture. Imagine the creamy texture of a freshly boiled Yukon Gold, or the earthy aroma of a baked Russet straight from your oven.
Variety Beyond the Ordinary
Commercial potato selection is often limited to a handful of common varieties. Growing your own opens the door to a world of unique and heirloom potatoes, each with its distinct flavor profile, color, and culinary use. Explore the nutty taste of fingerling potatoes or the vibrant purple hue of a Peruvian Purple potato.
Cost Savings and Sustainable Living
While there's an initial investment in seed potatoes and soil amendments, growing your own potatoes can lead to significant cost savings over time. Plus, gardening promotes sustainable living by reducing your reliance on commercially grown produce, minimizing transportation emissions, and allowing you to control the use of pesticides and herbicides.
Planning Your Potato Patch for Success
The journey to a potato harvest begins long before the first seed potato is nestled in the soil. Careful planning is essential, taking into account the unique characteristics of the Texas climate, selecting appropriate varieties, and preparing the soil to provide the optimal growing environment.
Understanding the Texas Climate and Growing Season
Texas is a large state, and its diverse climate necessitates a nuanced approach to potato planting. Optimal planting times vary considerably depending on your specific region. Generally, potatoes are planted in the late winter or early spring in South Texas, while Central and North Texas gardeners will aim for a late winter to early spring planting, allowing enough time for growth before the intense summer heat arrives.
Regional Planting Windows
The Hill Country and West Texas, with their higher elevations and cooler temperatures, can accommodate slightly later plantings.
Consulting your local Texas A&M AgriLife Extension office for specific planting recommendations for your county is highly recommended.
Frost Protection Strategies
Even during the ideal planting windows, the risk of frost remains a concern. Keep an eye on the weather forecast and be prepared to protect your young potato plants. Covering plants with blankets, burlap sacks, or even plastic sheeting can provide adequate protection during a light frost. For more severe freezes, consider using row covers or bringing container-grown potatoes indoors.
Choosing the Right Potato Variety for Texas
Not all potato varieties thrive equally well in Texas. Selecting varieties known for their heat tolerance and disease resistance is crucial for success.
Recommended Varieties
Russet potatoes are a popular choice for baking and frying, offering a classic potato flavor.
Red potatoes are excellent for boiling, roasting, and potato salads, known for their waxy texture and slightly sweet taste.
Yukon Gold potatoes are prized for their creamy texture and buttery flavor, making them versatile for various culinary applications.
Consider experimenting with other varieties, such as fingerling potatoes or purple potatoes, to add diversity and visual appeal to your harvest.
Flavor Profiles and Culinary Uses
Understanding the flavor profile and best culinary uses of each variety is essential for selecting potatoes that suit your taste and cooking preferences. Russets are starchy and fluffy when baked, while red potatoes hold their shape well when boiled. Yukon Golds offer a balance of starchiness and creaminess.
Soil Preparation for a Bountiful Harvest
Potatoes thrive in well-drained soil that is rich in organic matter. Proper soil preparation is paramount to achieving a bountiful harvest.
The Importance of Well-Drained Soil
Potatoes are susceptible to rot in overly wet conditions. Ensure that your planting bed has excellent drainage to prevent waterlogging. Amending heavy clay soils with compost, aged manure, or other organic materials can improve drainage and aeration.
Soil pH for Optimal Growth
Potatoes prefer slightly acidic soil, with a pH range of 6.0 to 6.5. Testing your soil pH is a critical first step. You can purchase a soil testing kit at your local garden center or send a sample to a soil testing laboratory for a more comprehensive analysis. If your soil pH is too high (alkaline), you can lower it by adding sulfur or acidifying fertilizers.
Amending Soil with Compost and Organic Matter
Compost and other organic materials not only improve soil drainage and aeration but also provide essential nutrients for potato growth. Incorporate a generous amount of compost into your planting bed before planting. You can also add other organic amendments, such as aged manure, leaf mold, or peat moss.
Sunlight Requirements: Finding Full Sun
Potatoes require at least 6-8 hours of direct sunlight per day to thrive. Choose a planting location that receives full sun throughout the growing season. Insufficient sunlight can result in weak, spindly plants and reduced tuber production.
If your garden has limited sunlight, consider using reflective materials to increase the amount of light reaching your potato plants. You can also strategically prune nearby trees or shrubs to reduce shading.
Planting Your Potatoes: From Seed to Sprout
With careful planning complete, the exciting stage of planting arrives. This phase is crucial for setting the foundation for a healthy and productive potato crop. From selecting the right seed potatoes to mastering the planting technique, each step contributes significantly to your potential harvest.
Selecting High-Quality Seed Potatoes
The journey begins with selecting high-quality seed potatoes. These are not simply potatoes from the grocery store. Certified seed potatoes are specifically grown for planting and are inspected to be free from diseases and pests.
Reputable Sources for Seed Potatoes
Your best bet is to purchase certified seed potatoes from reputable sources. Local nurseries, garden centers, and online seed suppliers are great starting points. Look for suppliers that specialize in seed potatoes. These suppliers are more likely to carry a wide selection of varieties suited to your area.
The "Chitting" Process: Giving Your Potatoes a Head Start
Consider “chitting,” or pre-sprouting, your seed potatoes before planting. This gives them a head start and can result in an earlier harvest. About 4-6 weeks before your planned planting date, place the seed potatoes in a cool (around 60-70°F), bright location. Egg cartons or shallow boxes work well.
The potatoes should develop short, stout, green sprouts (or "eyes"). Avoid long, spindly, white sprouts, which indicate insufficient light. These are more prone to damage during planting.
Preparing the Planting Bed for Optimal Growth
Proper bed preparation is just as vital as selecting the right seed potatoes. Potatoes need loose, well-drained soil to develop properly.
Rows or Raised Beds?
Both rows and raised beds can work well for growing potatoes in Texas. Rows are suitable for larger gardens with well-draining soil. Raised beds are especially beneficial in areas with heavy clay soils, as they improve drainage and aeration.
Row Spacing: Room to Grow
Regardless of your chosen method, adequate spacing is essential. Space rows at least 30-36 inches apart. This provides enough room for the plants to grow and for you to hill the soil around the stems later in the season. Hilling encourages more tuber production.
Planting Depth and Technique for Best Results
The final step is planting the seed potatoes correctly. This involves determining whether to cut them, orienting them properly, and planting at the correct depth.
Cutting Seed Potatoes: When and How
Larger seed potatoes can be cut into smaller pieces, each with at least one or two "eyes." This allows you to get more plants from a single seed potato. However, smaller, egg-sized potatoes can be planted whole. Cut the seed potatoes a day or two before planting. This allows the cut surfaces to suberize (heal over), which helps prevent rot.
Eye Orientation: Upward and Onward
Plant the seed potato pieces with the “eyes” facing upwards. This ensures that the sprouts can easily reach the surface.
Planting Depth: Burying the Treasure
Plant seed potatoes about 4-6 inches deep. Cover them with soil and gently water the planting bed. Be patient! It may take a few weeks for the sprouts to emerge. Once they do, you’re on your way to a bountiful potato harvest!
Caring for Your Potato Plants: Nurturing Your Crop
With careful planning complete, the exciting stage of planting arrives. Proper bed preparation is just as vital as selecting the right seed potatoes. Once your potatoes are nestled in their prepared beds, however, the journey is far from over. Now begins the ongoing process of nurturing your crop. This involves providing the right conditions for growth and protecting your plants from potential threats.
Watering Wisely for Healthy Tubers
Water is essential for potato development, particularly during tuber formation. Consistent moisture is key, ensuring the soil remains evenly damp but not waterlogged. Think of it like providing a steady, reliable drink for your plants, not a sudden deluge.
In Texas, this may mean more frequent watering during the hotter months. Check the soil moisture regularly by inserting your finger a couple of inches into the soil. If it feels dry, it's time to water.
Overwatering, on the other hand, can be detrimental. Soggy soil deprives the roots of oxygen, leading to rot and increasing the risk of fungal diseases. Ensure your planting beds have good drainage to prevent water from pooling.
Fertilizing for Abundant Growth
Potatoes are heavy feeders and benefit from regular fertilization. A balanced fertilizer, specifically formulated for potato growth, will provide the essential nutrients they need. Look for a fertilizer with a relatively even ratio of nitrogen (N), phosphorus (P), and potassium (K), such as 10-10-10 or 14-14-14.
Understanding Key Nutrients
Each of these nutrients plays a vital role:
-
Nitrogen (N): Promotes healthy foliage growth.
-
Phosphorus (P): Encourages strong root development and tuber formation.
-
Potassium (K): Enhances overall plant health and disease resistance.
The Benefits of Side-Dressing
Consider side-dressing your potato plants a few weeks after they emerge and again when they begin to flower. This involves applying fertilizer along the sides of the rows, a few inches away from the plants. Gently work the fertilizer into the soil and water thoroughly. Side-dressing provides a boost of nutrients when the plants need them most.
Pest Control: Protecting Your Plants
Potatoes, unfortunately, are susceptible to various pests. Early detection and intervention are crucial for preventing significant damage to your crop.
Identifying Common Pests
One of the most common culprits is the Colorado potato beetle. These beetles and their larvae can quickly defoliate potato plants. Look for yellow-orange eggs on the undersides of leaves, as well as the distinctive striped beetles themselves.
Other potential pests include aphids, flea beetles, and potato psyllids. Regularly inspect your plants for any signs of infestation.
Organic and Chemical Control Methods
For organic pest control, consider using insecticidal soap, neem oil, or Bacillus thuringiensis (Bt). These options are effective against many common potato pests while minimizing harm to beneficial insects.
Hand-picking beetles and larvae is also an effective, albeit time-consuming, method.
For more severe infestations, chemical insecticides may be necessary. Always follow the instructions on the product label carefully, and choose options that are specifically labeled for use on potatoes. Consider the environmental impact of each method.
Disease Management: Prevention and Treatment
Like pests, diseases can also wreak havoc on potato crops. Prevention is always the best approach.
Strategies for Preventing Disease
-
Plant certified disease-free seed potatoes.
-
Practice crop rotation to prevent soil-borne diseases from building up.
-
Ensure good air circulation around your plants by spacing them properly and pruning away any overcrowded foliage.
Addressing Diseases
If you notice signs of disease, such as leaf spots, wilting, or tuber rot, take action immediately. Remove and destroy any affected plants to prevent the disease from spreading.
Fungicides can be used to control certain potato diseases, such as early blight and late blight. Choose a fungicide that is specifically labeled for use on potatoes and follow the instructions carefully.
Utilizing Texas A&M AgriLife Extension Resources
Don't navigate the world of potato growing alone! The Texas A&M AgriLife Extension offers a wealth of resources and support for gardeners and farmers. From publications and online guides to workshops and expert advice, they can provide valuable assistance in every stage of the growing process.
Visit their website or contact your local county extension office to learn more about potato cultivation in your region and access tailored recommendations for your specific needs. They're a fantastic source of knowledge and can help you achieve a successful and bountiful potato harvest.
Harvesting and Storage: Reaping the Rewards
After weeks of diligent care, from watering and fertilizing to warding off pests and diseases, the moment of truth arrives: harvest time. Knowing when and how to harvest and store your potatoes correctly is just as critical as the earlier stages of cultivation. Proper harvesting and storage ensures you can enjoy the fruits (or, rather, tubers) of your labor for months to come.
Knowing When to Harvest Your Potato Crop
The timing of your potato harvest hinges on what you intend to do with your spuds. Do you crave the delicate flavor of new potatoes, or do you prefer the heartier, longer-lasting mature variety?
Signs of Maturity
Keep a close eye on your potato plants. The most obvious sign that your potato crop is nearing harvest time is the yellowing and eventual browning of the foliage. This indicates the plant is nearing the end of its life cycle. The plant is focusing its energy on tuber development. However, this signal doesn't necessarily mean all the potatoes are ready to be dug up.
New Potatoes vs. Mature Potatoes
New potatoes are typically harvested a few weeks after the plants have finished flowering, while the foliage is still green. They are smaller, have thinner skins, and a sweeter, more delicate flavor. These are best enjoyed shortly after harvest, as they don't store well.
To harvest new potatoes, carefully dig around the base of a plant. Gently remove a few of the developing tubers, leaving the rest to mature further.
For fully mature potatoes, wait until the foliage has completely died back. This usually occurs a couple of weeks after the yellowing stage. Mature potatoes have thicker skins, making them ideal for long-term storage.
Digging Up Your Treasure
Harvesting potatoes requires a gentle touch to avoid damaging the precious tubers. A garden fork is often the best tool for the job.
Insert the fork into the soil a few inches away from the plant's base. Carefully lift the soil, being mindful not to pierce any potatoes. Gently remove the soil around the tubers with your hands.
Collect the potatoes and inspect them for any damage. Discard any that are severely cut or bruised, as these will not store well. A few minor nicks are generally fine.
Curing and Storing Potatoes for Long-Term Preservation
Proper curing and storage are essential for extending the shelf life of your potatoes.
The Curing Process
Before storing your potatoes, it's crucial to allow them to cure. Curing involves allowing the potatoes to dry and their skins to harden. This helps to prevent rot and disease during storage.
To cure your potatoes, spread them out in a single layer in a cool, dry, and well-ventilated location for about one to two weeks. Avoid direct sunlight, which can cause the potatoes to turn green and develop solanine, a bitter-tasting and toxic compound.
Ideal Storage Conditions
Once the potatoes are cured, transfer them to their long-term storage location. The ideal storage conditions for potatoes are cool, dark, and well-ventilated. A temperature between 40-50°F (4-10°C) is ideal. A root cellar or unheated garage often provides suitable conditions.
Store the potatoes in breathable containers. Options include burlap sacks, cardboard boxes with holes, or wooden crates. Avoid storing potatoes in plastic bags, as this can trap moisture and promote rot.
Check your stored potatoes regularly. Remove any that show signs of spoilage to prevent the rot from spreading to the others. With proper harvesting and storage, you can enjoy your homegrown Texas potatoes for many months, bringing the taste of your garden to your table throughout the year.
Video: Texas Potatoes: A Growing Guide for Bumper Crops!
FAQs: Growing Bumper Texas Potato Crops
Here are some common questions about growing potatoes successfully in Texas and maximizing your harvest.
What are the best potato varieties to grow in Texas?
Early-maturing varieties are generally recommended for Texas due to our shorter growing season and hotter summers. Some popular choices include Yukon Gold, Red La Soda, and Irish Cobbler. These varieties have proven to produce good yields of Texas potatoes.
When is the best time to plant potatoes in Texas?
The ideal planting time for Texas potatoes is late winter to early spring (February-March) in most regions. In South Texas, planting can begin even earlier, around January. The goal is to harvest before the intense summer heat sets in.
How do I prepare the soil for growing Texas potatoes?
Potatoes need well-drained, loose soil. Amend your soil with compost or well-rotted manure to improve drainage and fertility. Potatoes prefer slightly acidic soil, so a soil test can help determine if any amendments are needed. This will help provide the best growing conditions for your Texas potatoes.
How often should I water my potato plants in Texas?
Consistent moisture is crucial, especially during tuber formation. Water deeply when the top inch of soil feels dry. Avoid overwatering, as this can lead to rot. Texas potatoes like consistent hydration. Monitor your plants closely and adjust watering based on weather conditions.
So get out there and get planting! We hope you enjoy the fruits (or vegetables!) of your labor. And remember, even if you don't get a bumper crop the first time, keep experimenting and learning – that's half the fun of growing your own texas potatoes!
